
Launch The Hub eCommerce app right on your desktop / server

Support Team
Codegen7.devIntroduction
Thank you for choosing The Hub eCommerce project from Codegen7.dev.
This is white-label full stack ecommerce project is designed from real-world usecases and
follows an enterprise design to carter for varying usecases.
At the core, common features of an e-commerce have been well thought out and implemented. These include:
- Cart
- Search
- Product Categorization in three levels (i.e., Electronics > Computers > Laptops)
One of the superior features (especially in backend design) is the Saga pattern that caters for safe transaction processing, a backend-for-frontend that provides a single access point into the business backend.
We'll look at these aspects in their separate sections. See Architecture for more information on all this and more.
Let's now dive into Getting Started for the first time.
Prerequisites
Before you begin, make sure you have the following installed:
- Node.js (v18 or higher)
- Angular CLI (v16)
- Java 17 (JDK)
- Spring Boot 3.3.0
- MySQL 8
- Docker & Docker Compose
-
IDEs
-
 Visual Studio Code
- recommended for editing the Angular app
Visual Studio Code
- recommended for editing the Angular app
-
 Spring Tool Suite (STS)
- a native IDE for Spring Boot with out-of-the-box functionality to run your Spring applications smoothly.
Spring Tool Suite (STS)
- a native IDE for Spring Boot with out-of-the-box functionality to run your Spring applications smoothly.
Take note that if you are uncomfortable with STS, plugins are available on the site to help you enable your favourite IDE (such as Visual Studio Code)However, you can run the apps purely without IDE support, with just slight usage of Text Editors such as Nodepad, Sublime Text to update few configurations of the apps
-
System Requirements
Before running The Hub E-Commerce Platform, ensure your system meets the following minimum requirements. These help guarantee smooth development, build processes, and production deployment.
| Requirement | Minimum | Recommended |
|---|---|---|
| Operating System | Windows 10 / macOS Monterey / Ubuntu 20.04 LTS | Latest stable release of Windows, macOS, or Ubuntu |
| Processor | Dual-core CPU | Quad-core CPU or higher |
| RAM | 8 GB | 16 GB or higher |
| Storage | 2 GB free space | 10 GB SSD storage (for faster builds) |
| Node.js | v18.x | Latest LTS (v20+) |
| Angular CLI | v16.x | Latest stable Angular CLI |
| Java JDK | Java 17 | Java 17 LTS (Adoptium / Oracle JDK) |
| Database | MySQL 8.x | MySQL 8.x with InnoDB storage engine |
| Docker (optional) | Docker Engine + Docker Compose v2 | Latest stable Docker Desktop or server edition |
Setup
Once you download the apps as a single zip file, extract the contents of the zip file into a single dedicated directory.
Let's say hub under your user directory.
So the full working directory (in Linux) is: /home/user/hub
If you are in Windows, the setup will be no different. Feel comfortable. Your directory could be C://Users/user/hub
Now /home/user/hub contains your two apps:
- hub-ecommerce-frontend
- hub-ecommerce-backend
hub-ecommerce-frontend
Let's start with the Angular app. Assuming you have observed the prerequisites (NodeJs 18+), this setup will be real quick
1. Install the modules npm install
Navigate to the hub frontend directory in your terminal (CTRL + ` in VsCode)
cd /home/user/hub/hub-ecommerce-frontend

npm install
Wait for the packages to install
2. Run the application
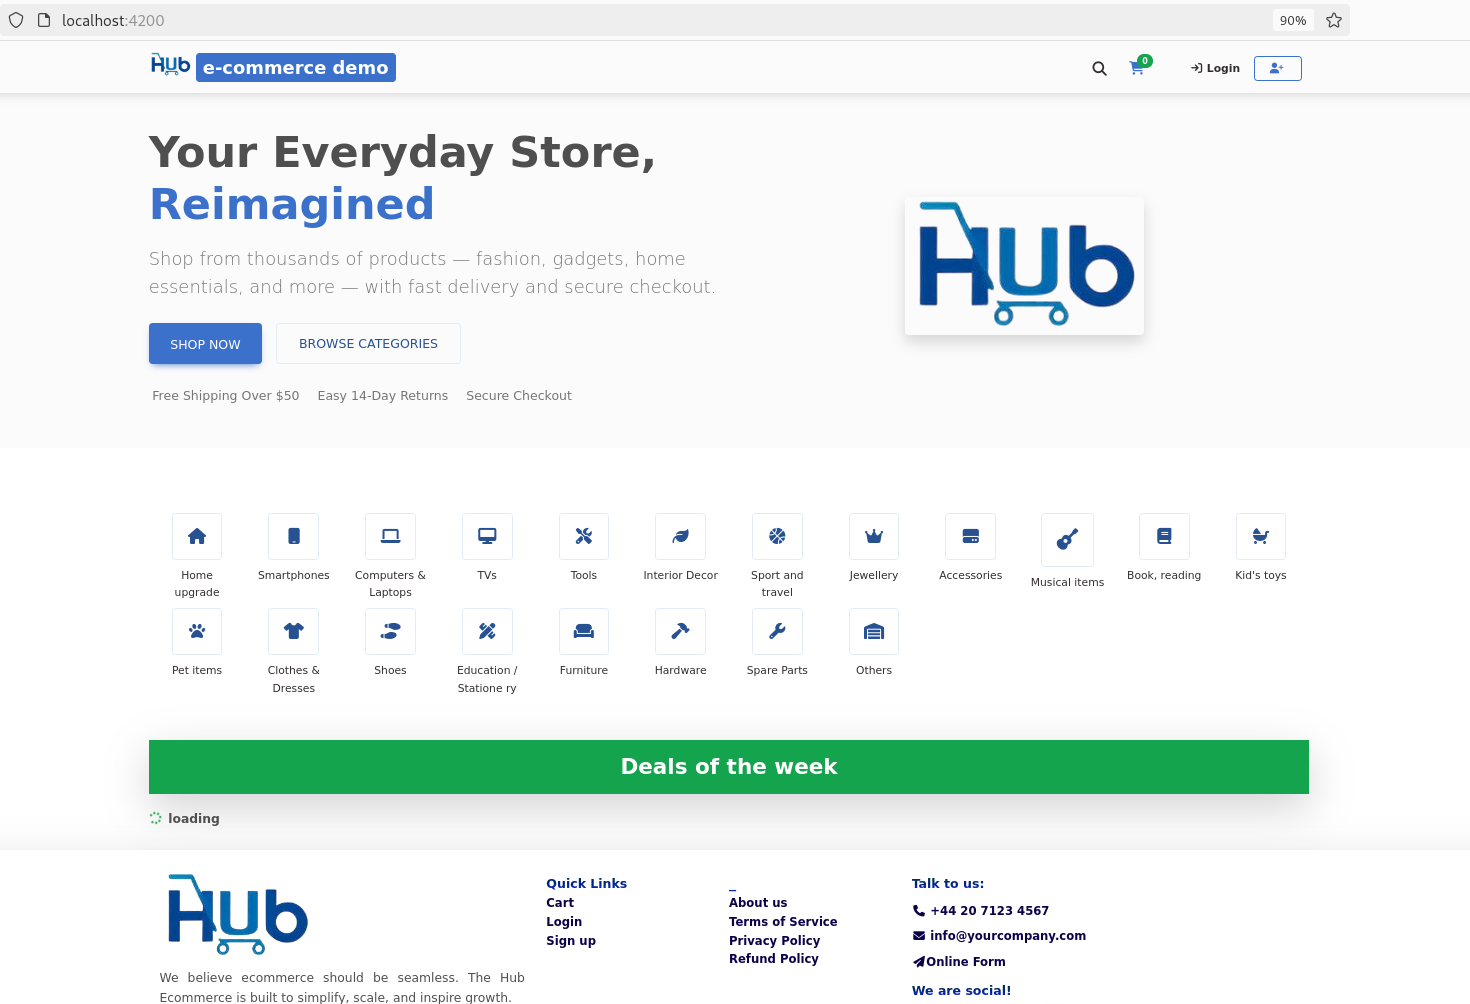
Once the packages (dependencies) have installed, enter the following command to spin up the applicationnpm startIn your favorite browser, navigate to the following URL: http://localhost:4200
hub-ecommerce-backend
The Hub eCommerce platform is powered by a robust architecture and set of microservices.
Several patterns have been used here, influenced by the need for separation of concerns, resilience, flexibility and integration readiness
For more information on this, refer to the Backend Documentation. Let's kick in.
1. MySQL 8.x Database
Ensure that MySQL database is already running. Take note of the database credentials.
Log in to the MySQL server
Create initial (blank) schema with the following command:
create schema hub_dbNavigate to the following file of the dbops-service and update the database credentials
cd /home/user/hub/hub-ecommerce-backend/dbops-service/src/main/resources/application.yml
Update the following section with your db credentials:
 datasource:
  url: jdbc:mysql://localhost:3306/hub_db
  username: <your-db-username>
  password: <your-db-password>
NOTE: If you have Docker, with Compose enabled, you can skip the manual steps below by just running Docker compose from the project:
cd /home/user/hub/hub-ecommerce-backend

./gradlew build && docker compose build && docker compose up -d
If you are not ready with Docker compose, please continue with following manual steps to prepare for hub-ecommerce-backend
2. Install RabbitMQ
You can run a local version of RabbitMQ, or use the Docker option. You'll find the guide on their website.
Confirm the following settings match with the host and port that your RabbitMQ is running
Line 79: /home/user/hub/hub-ecommerce-backend/aggregate-service/src/main/resources/application.yml
spring.rabbitmq:
 host: 127.0.0.1
 port: 5672
 username: guest
 password: guest
3. Install Redis
Redis cache has been preferred to persist user sessions and is only used by bffweb service. In local setups, we have excluded this requirement. It is available with the production setup (See Docker compose). Click here to find out how to install Redis.
This step is completely optional. You can enable Redis with the following steps:
cd /home/user/hub/hub-ecommerce-backend/bffweb/src/main/resources/application.yml
spring.data.redis:
 host: redis
 port: 6379
4. Launch the Backend
Use the following order to launch the services:
- dbops-service
- aggregate-service
- bffweb
- api & util are libraries
- notification - designed to take care of messaging aspects of the application such as SMS & Email deliveries
- callout-service - designed to handle outbound HTTP requests such as calls to third party services
Backend Documentation
During startup, the dbops-service will initialize the schema and seed the database. You can disable this once you get comfortable running it with your custom data.
Swagger documentations are available for the backend services:
- dbops-service http://localhost:9093/openapi/webjars/swagger-ui/index.html
- aggregate-service (service bus) http://localhost:9090/openapi/webjars/swagger-ui/index.html
- notification-service http://localhost:9090/openapi/webjars/swagger-ui/index.html
- callout-service http://localhost:9090/openapi/webjars/swagger-ui/index.html
5. Access the Application
Once the services are up, head back to the browser and reload your Angular app: https://localhost:4200FAQ
Do I need Docker to run this project?
No. You can run the frontend and backend separately using Angular CLI and Spring Boot. Docker is optional but recommended for production.
Which databases are supported?
By default MySQL 8 is supported. You can extend the project to use PostgreSQL or other JDBC-compatible databases.